Wednesday, 27 July 2016
Tuesday, 26 July 2016
Tuesday, 19 July 2016
Tuesday, 5 July 2016
Rocks Continued
Not much more I can say about rocks, accept that I made a few more large ones. These'll be used to make various natural structures. I'm planning on using these to create a new rock tileable texture for the landscape.
Below you can see one of the intended uses of these models. By arranging the rocks in these various ways I can create a plethora of convincing formations whilst avoiding any repetition in the environment.Monday, 4 July 2016
Improving rock textures
Being dissatisfied with my previous rock textures, I set out todey to improve them somewhat. I went back to Mudbox and imported a few of the maps I'd made before. Setting the scene to flat lighting, I used ambient occlusion, cavity and edge-highlight maps to get the result below.
Using an image of a cliffside, found on cgtextures.com, I painted the texture directly on using it as a stencil. Making sure to align the sediment and avoid any stretching so it looked natural, this was quite a time consuming process. The result was worth the effort though, even with flat lighting the rock already looked much better than my last attempt.
With the new colour map finished, I needed to update my normal to include the crevices and cracks in the texture. Through Photoshop, using the xNormal plugin, I converted and edited the colourmap into a normal. This took a few attempts until I was satisfied with the result, after, I combined this new normal with the original using a simple overlay layer. At this point its more-or-less complete, the final touches were to tweak the colour range back in Photoshop and combine the ambient occlusion, cavity, etc.
Currently in my Unity scene, the rock textures used on the terrain had a slight brown colouration, so I tweaked the colour map to reflect this, its fit with the surroundings much better. I am very pleased with the results, and will certainly use the same process on future rock formations.
In-engine pictured below
Sunday, 3 July 2016
Rocks!
So, onto my most recent foray into the environment creation. I need rocks, only a few as of right now, as building blocks are required to start giving the landscape some direction. I previously created a rock for another project and will be editing that one in due time, as of right now I'm starting from scratch for more variation.
The first step was the high poly rock, taking a simple cube from Maya with a few subdivisions and importing it to Mudbox as a base mesh. Using mostly the scrape tool with a mask, I slowly moulded the rock I envisioned. My previous rock had been narrow and tall, this instance was to be the opposite, like a large boulder that would fill up the cliff sides or create rocky structures. The final high poly mesh was around 2,000,000 polys. I exported this to be used in 3dCoat.
Now that I had a chunky piece of rock, using the import function in 3dCoat, I began to combine multiple versions of the same rock with varying scales. I was careful not to repeat patterns, avoiding similarities when put in engine. The reason for using 3dCoat is simple, its real-time movement of high-poly meshes is incredibly useful as well as seamlessly merging multiple meshes, its quick at what it does too. After a quick touch-up the final high-poly mesh was ready, the next step was to decimate it low enough for the low-poly that will be seen in-engine.
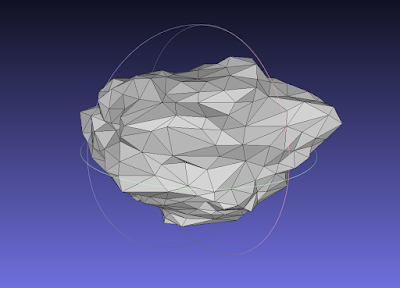
Using MeshLab's fantastic decimation filter, my rock is down to 800 tris, enough detail for the silhouette and not to much for the engine. Next I used this in conjunction with the high-poly version inside of Mudbox and xNormal to create the various maps needed.
My first go at texturing the rock was using Quixel, this is the same process used for my last rock. It turned out pretty well, though there is room for improvement. I didn't spend much time on this stage, I wanted to get the rock in-engine to play around with the form of it more than the texture fidelity.
As I stated, the texture process was very similar to that of the previous rock, as seen in this comparison they look like they belong in the same scene. Using both variants I decided to try creating a cave. The shapes complemented well and I was able to create a very rudimentary cave, it would need a lot more to look convincing, but for now at get my idea across and visualised. I want to take these rocks a bit further before I'm finished with them though, improving the textures is my next course of action.
Subscribe to:
Comments (Atom)


