Tuesday, 28 November 2017

Long time no see - In other news, Pixel Art

Since the middle of my third year at university, I began neglecting this blog. It became somewhat of a chore, and since, I've simply been posting portfolio pieces and straight on my Artstation. Well, not recently, unfortunately I have little spare time these days to create games art, and even updates to my Artstation has been grinding to a halt.

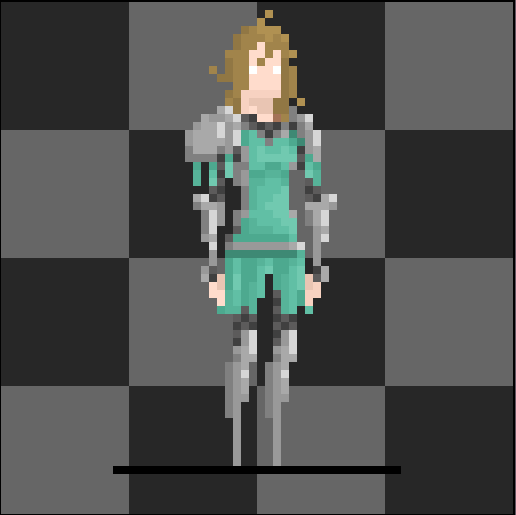
Continuing, shortly after finishing my final year, for a week I was the environment artist for a little game-jam project. This was a pixel art twin-stick-style shooter. So I have some experience with this kind of art-direction, though this has been my first foray into animating it. Well... that's not entirely true, I've animated sprites for particle effects, but this is a whole new can of worms! Some basic character designs are done after quickly making some silhouettes (male and female base), a couple basic animations, and a brief try at an armour set.


Tuesday, 5 July 2016

Rocks Continued

Not much more I can say about rocks, accept that I made a few more large ones. These'll be used to make various natural structures. I'm planning on using these to create a new rock tileable texture for the landscape.
Below you can see one of the intended uses of these models. By arranging the rocks in these various ways I can create a plethora of convincing formations whilst avoiding any repetition in the environment.

Monday, 4 July 2016

Improving rock textures

Being dissatisfied with my previous rock textures, I set out todey to improve them somewhat. I went back to Mudbox and imported a few of the maps I'd made before. Setting the scene to flat lighting, I used ambient occlusion, cavity and edge-highlight maps to get the result below.
Using an image of a cliffside, found on cgtextures.com, I painted the texture directly on using it as a stencil. Making sure to align the sediment and avoid any stretching so it looked natural, this was quite a time consuming process. The result was worth the effort though, even with flat lighting the rock already looked much better than my last attempt.
With the new colour map finished, I needed to update my normal to include the crevices and cracks in the texture. Through Photoshop, using the xNormal plugin, I converted and edited the colourmap into a normal. This took a few attempts until I was satisfied with the result, after, I combined this new normal with the original using a simple overlay layer. At this point its more-or-less complete, the final touches were to tweak the colour range back in Photoshop and combine the ambient occlusion, cavity, etc.
Currently in my Unity scene, the rock textures used on the terrain had a slight brown colouration, so I tweaked the colour map to reflect this, its fit with the surroundings much better. I am very pleased with the results, and will certainly use the same process on future rock formations. 

In-engine pictured below


Sunday, 3 July 2016

Rocks!

 My work on the game project has been rather slow the past couple weeks. Recently, I've acquired a 3D printer of my own, I have previous experience 3D printing and have been spending a lot of time configuring it. After printing some bits and pieces I created in Maya, I came to the realise teaching myself a CAD package would help drastically with some of the more measurement sensitive things I'd like to print. As such, my time has been somewhat split between the game and AutoCAD, but I'm beginning to get back on track with the game environment.

So, onto my most recent foray into the environment creation. I need rocks, only a few as of right now, as building blocks are required to start giving the landscape some direction. I previously created a rock for another project and will be editing that one in due time, as of right now I'm starting from scratch for more variation.

The first step was the high poly rock, taking a simple cube from Maya with a few subdivisions and importing it to Mudbox as a base mesh. Using mostly the scrape tool with a mask, I slowly moulded the rock I envisioned. My previous rock had been narrow and tall, this instance was to be the opposite, like a large boulder that would fill up the cliff sides or create rocky structures. The final high poly mesh was around 2,000,000 polys. I exported this to be used in 3dCoat.
Now that I had a chunky piece of rock, using the import function in 3dCoat, I began to combine multiple versions of the same rock with varying scales. I was careful not to repeat patterns, avoiding similarities when put in engine. The reason for using 3dCoat is simple, its real-time movement of high-poly meshes is incredibly useful as well as seamlessly merging multiple meshes, its quick at what it does too. After a quick touch-up the final high-poly mesh was ready, the next step was to decimate it low enough for the low-poly that will be seen in-engine. 
Using MeshLab's fantastic decimation filter, my rock is down to 800 tris, enough detail for the silhouette and not to much for the engine. Next I used this in conjunction with the high-poly version inside of Mudbox and xNormal to create the various maps needed.
My first go at texturing the rock was using Quixel, this is the same process used for my last rock. It turned out pretty well, though there is room for improvement. I didn't spend much time on this stage, I wanted to get the rock in-engine to play around with the form of it more than the texture fidelity.
As I stated, the texture process was very similar to that of the previous rock, as seen in this comparison they look like they belong in the same scene. Using both variants I decided to try creating a cave. The shapes complemented well and I was able to create a very rudimentary cave, it would need a lot more to look convincing, but for now at get my idea across and visualised. I want to take these rocks a bit further before I'm finished with them though, improving the textures is my next course of action. 


Tuesday, 21 June 2016

Stone Structures Tile Set

After the success of the small beacon structure from the previous post, I decided to begin creating a stone structure tile set. Each piece will be able to snap to each other in a plethora of configurations to quickly craft thing like temples, bridges and ruins, to populate the game world. Using very basic textures, I quickly made some shapes that looked somewhat fantasy, though I had a lot of influence from ancient Inca and Mayan structures. The key to making a tile set like this is to keep every piece within certain measurements, using the snap-to-grid mode, I kept everything within twelve units.


As well as the larger pieces, I've began to make smaller 'dividers'. These will snap over top of texture seams that result when placing the larger walls together. I've kept the polycount fairly low for most objects, though I went back to the stairs to add more features.

Using the texture in Maya, I lined up edge-loops with the bricks shown. This allowed me to emphasise individual bricks. The normal map alone didn't give enough definition, and using this method is easy and gives great results. I will do the same with the floor tiles in the future.


Now that each piece was modelled I moved it all into engine to see how it looked. Using my previously created splatting shader, I applied the correct maps to every object and snap them together in some form. Personally, I am pleased with the result. A structure made from the objects almost looks seamless once the dividers are placed. Unfortunately the texture resolution is rather low, as it was a test I simply used 1024x1024 textures, I'm planning to bump this up to 2048x2048.


These are the only components I made during this session, and I'll continue adding to it, as well as improving the textures. Though, I must be careful not to used too many texture sheets. Moving onto 2k will allow me to add extra features to existing texture maps, allowing for a more varied tile set.

Finally, I experimented with adding destruction to the model. I anchored the three sides of the stone fence piece and broke it apart. It looks quite convincing, and with a few improvements to the mesh, it will work rather well.


Saturday, 18 June 2016

Shaders and Early Textures

I've experimenting a lot with Shader Forge recently. I worked through a few tutorials online to get myself more familiarised with it. Learning this Unity plugin is key to my success with this environment, its an incredibly powerful tool and will help to seamlessly blend the world together. But first, I went back to basics. Unfortunately, during my previous project I didn't get much assistance from my lecturers with the usages of Shader Forge, so by following online tutorials I quickly got the hang of it. Some of these shaders may not seem particularly associated with environment, they can easily be edited to suit any needs. I should also note that many of the textures are taken from CGTextures, its a great site for placeholder texture maps whilst I work on my own.

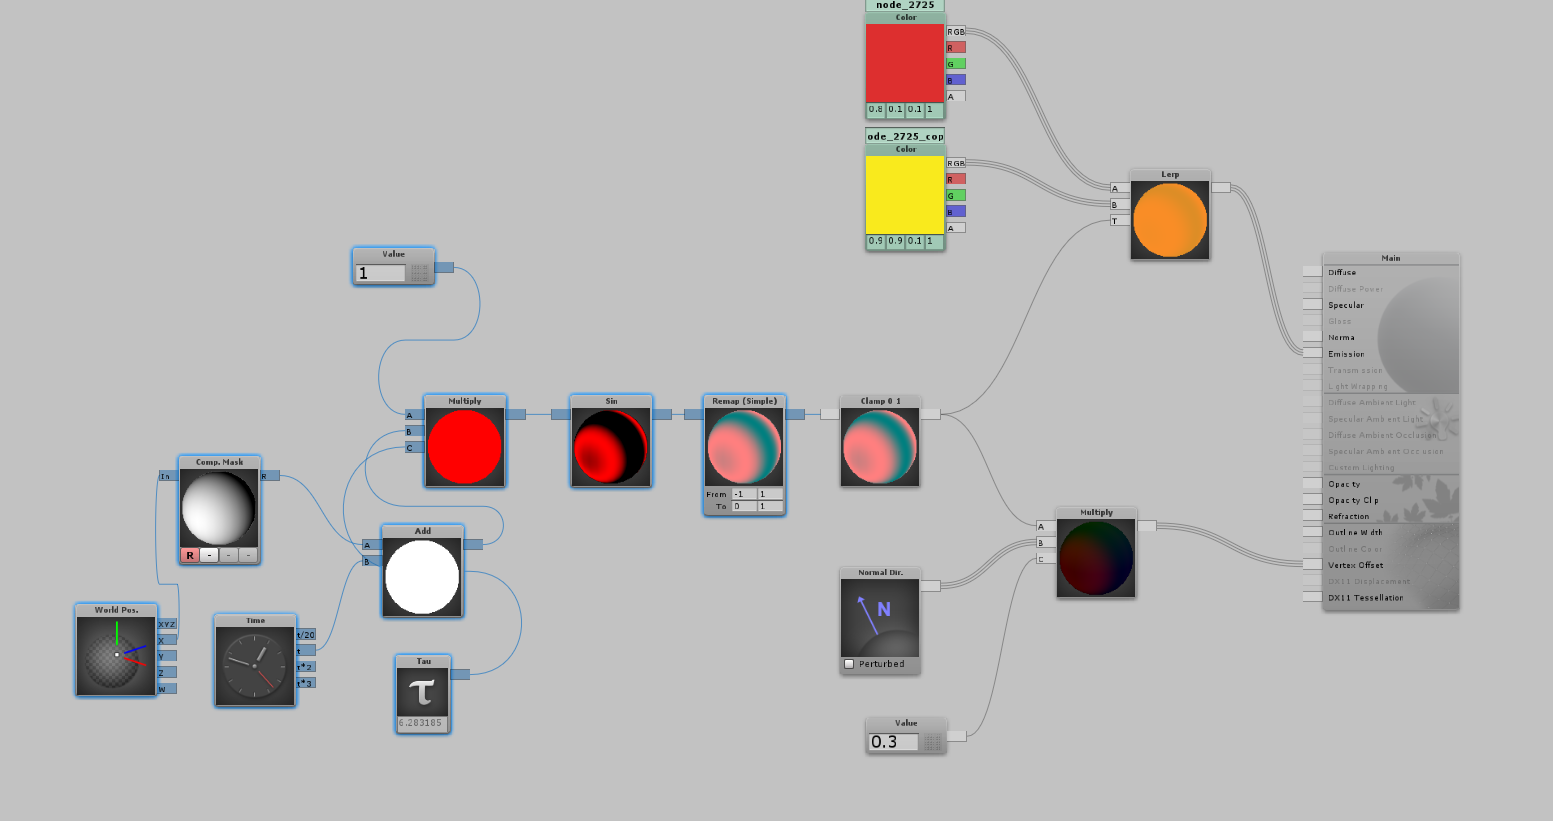
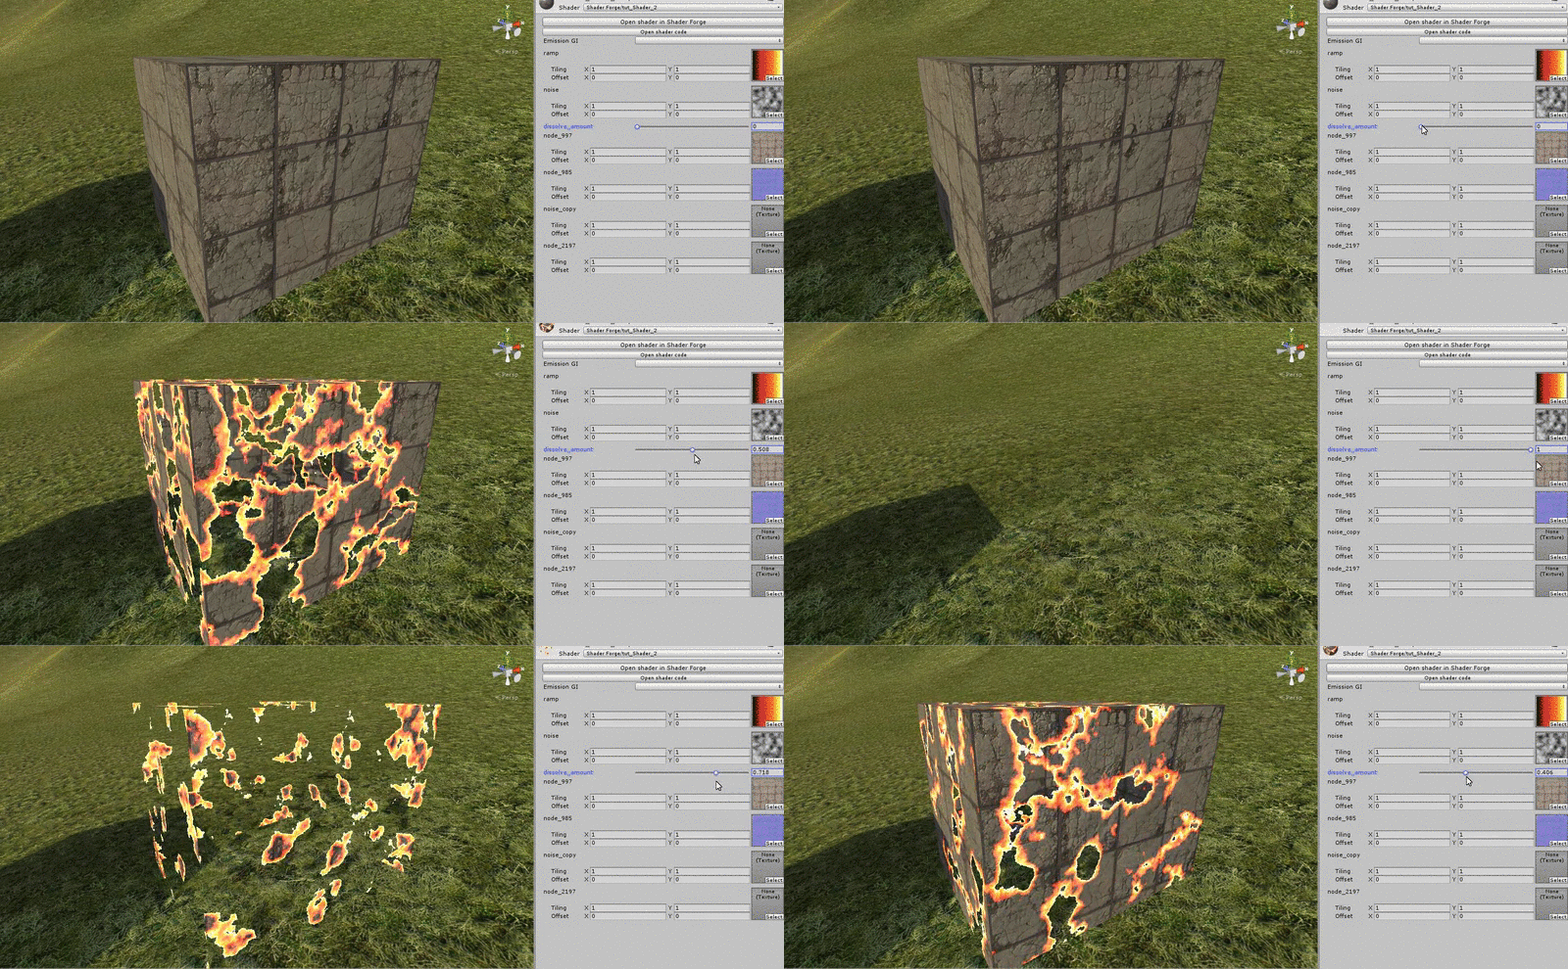
Using gradients you can create some wacky shaders by manipulating the UVs. It creates some fascinating animated objects. By inputting a noise texture in the form of clouds from Photoshop, I was able to make a shader that could "dissolve" a texture, adding a colour ramp gave the illusion of fire, though I have yet to figure out how to animate this.


Continuing my experimenting I create a shader that would use heightmap generated from the texture to place an animated glow between the gaps in stone bricks for example.


For what I wanted to do, I needed a more accurate heightmap. I plan on using vertex painting to blend two textures together, for example grass growing up and between stone brick. I created a couple variants, one simply used vertex painting to dictate how far the grass will grow between the bricks, and another which combined the vertex painted grass with an amount of noise generated grass. The latter would be used for structures I want to appear old, as if grass has began growing over it, this variant I prefer at this moment. The former I've had more trouble with, I may need to revise it once again to get the desired effect correctly. 


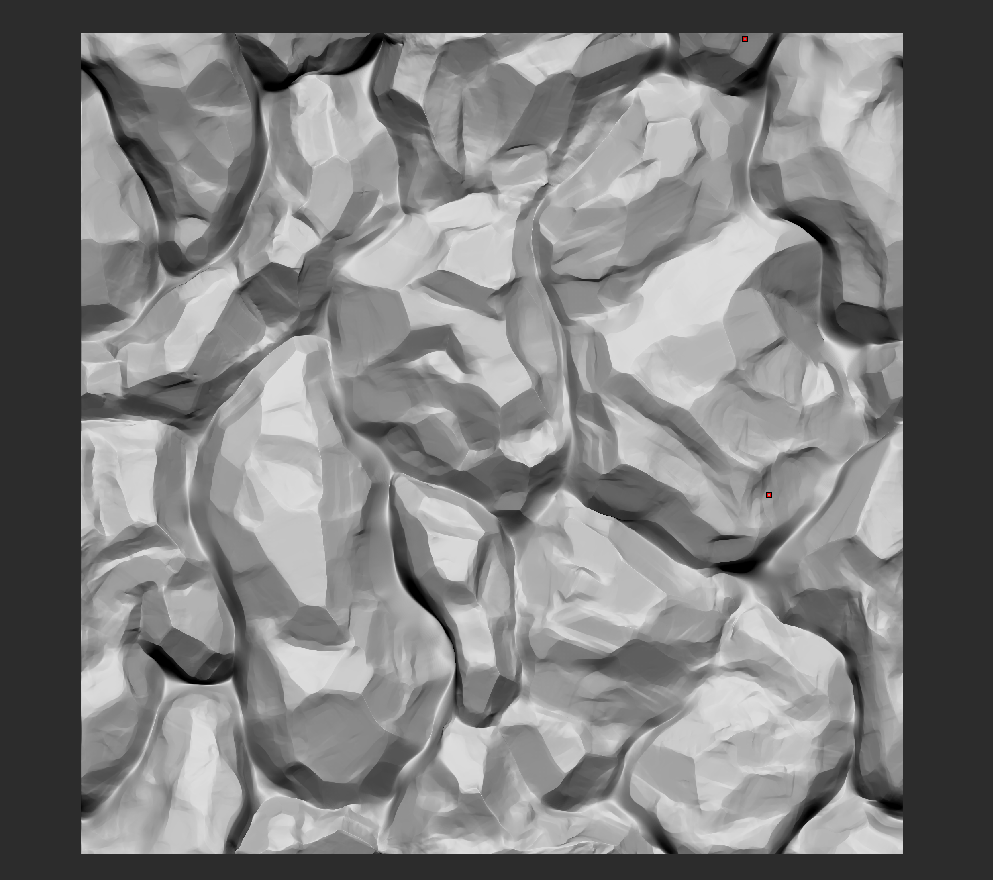
My final topic of this post is about some initial texture work. I wanted a way of quickly texturing many object quickly and with minimal texture maps. Using ZBrush I created the brick diffuse and normal map seen on the stone fence above. I hope to reuse this on many brick structures. The next bit of texture work was to create a single diffuse and normal map for a magnitude of unique objects, a put together a quick example below. From here I will finish the two maps and continue experimenting with workflows. Learning the texturing process for large, diverse environments is much more strenuous than I'd thought, there seems to be little to nothing online. Most of my information has be taken from studying the games I play, Dark Souls 3 in particular has influenced me a lot as of late.