Tuesday, 21 June 2016

Stone Structures Tile Set

After the success of the small beacon structure from the previous post, I decided to begin creating a stone structure tile set. Each piece will be able to snap to each other in a plethora of configurations to quickly craft thing like temples, bridges and ruins, to populate the game world. Using very basic textures, I quickly made some shapes that looked somewhat fantasy, though I had a lot of influence from ancient Inca and Mayan structures. The key to making a tile set like this is to keep every piece within certain measurements, using the snap-to-grid mode, I kept everything within twelve units.

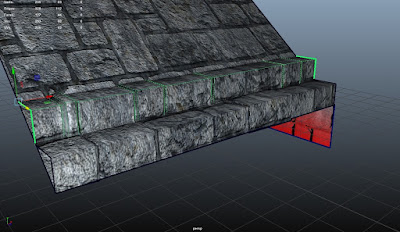
As well as the larger pieces, I've began to make smaller 'dividers'. These will snap over top of texture seams that result when placing the larger walls together. I've kept the polycount fairly low for most objects, though I went back to the stairs to add more features.

Using the texture in Maya, I lined up edge-loops with the bricks shown. This allowed me to emphasise individual bricks. The normal map alone didn't give enough definition, and using this method is easy and gives great results. I will do the same with the floor tiles in the future.


Now that each piece was modelled I moved it all into engine to see how it looked. Using my previously created splatting shader, I applied the correct maps to every object and snap them together in some form. Personally, I am pleased with the result. A structure made from the objects almost looks seamless once the dividers are placed. Unfortunately the texture resolution is rather low, as it was a test I simply used 1024x1024 textures, I'm planning to bump this up to 2048x2048.


These are the only components I made during this session, and I'll continue adding to it, as well as improving the textures. Though, I must be careful not to used too many texture sheets. Moving onto 2k will allow me to add extra features to existing texture maps, allowing for a more varied tile set.

Finally, I experimented with adding destruction to the model. I anchored the three sides of the stone fence piece and broke it apart. It looks quite convincing, and with a few improvements to the mesh, it will work rather well.


Saturday, 18 June 2016

Shaders and Early Textures

I've experimenting a lot with Shader Forge recently. I worked through a few tutorials online to get myself more familiarised with it. Learning this Unity plugin is key to my success with this environment, its an incredibly powerful tool and will help to seamlessly blend the world together. But first, I went back to basics. Unfortunately, during my previous project I didn't get much assistance from my lecturers with the usages of Shader Forge, so by following online tutorials I quickly got the hang of it. Some of these shaders may not seem particularly associated with environment, they can easily be edited to suit any needs. I should also note that many of the textures are taken from CGTextures, its a great site for placeholder texture maps whilst I work on my own.

Using gradients you can create some wacky shaders by manipulating the UVs. It creates some fascinating animated objects. By inputting a noise texture in the form of clouds from Photoshop, I was able to make a shader that could "dissolve" a texture, adding a colour ramp gave the illusion of fire, though I have yet to figure out how to animate this.


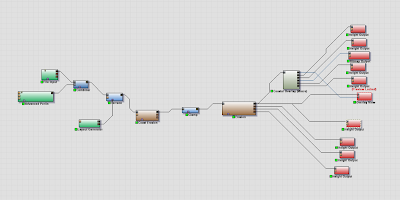
Continuing my experimenting I create a shader that would use heightmap generated from the texture to place an animated glow between the gaps in stone bricks for example.


For what I wanted to do, I needed a more accurate heightmap. I plan on using vertex painting to blend two textures together, for example grass growing up and between stone brick. I created a couple variants, one simply used vertex painting to dictate how far the grass will grow between the bricks, and another which combined the vertex painted grass with an amount of noise generated grass. The latter would be used for structures I want to appear old, as if grass has began growing over it, this variant I prefer at this moment. The former I've had more trouble with, I may need to revise it once again to get the desired effect correctly. 


My final topic of this post is about some initial texture work. I wanted a way of quickly texturing many object quickly and with minimal texture maps. Using ZBrush I created the brick diffuse and normal map seen on the stone fence above. I hope to reuse this on many brick structures. The next bit of texture work was to create a single diffuse and normal map for a magnitude of unique objects, a put together a quick example below. From here I will finish the two maps and continue experimenting with workflows. Learning the texturing process for large, diverse environments is much more strenuous than I'd thought, there seems to be little to nothing online. Most of my information has be taken from studying the games I play, Dark Souls 3 in particular has influenced me a lot as of late.


Speed Tree and Foliage

Speed Tree is another program I'm new to, recommended to me by a friend, it aims to speed up the process of making anything foliage related; from ferns to trees. During my first session using it I create a few things to start filling up my landscape.

Firstly, using some of the provided textures I created a basic tree and bush, added colliders, wind animations, etc. Once I had a grasp of the interface, the software was very easy to understand and gave a great depth of creative freedom.


The grass shown in the images above was created previously. Using Maya, I made and arranged some blades of grass and applied a basic colour ramp texture. I projected the grass onto a flat plane and exported it to use in Photoshop. After editing the colour and creating the alpha channel, I dilated the image a few times before importing it into Unity for use.


I went back into Speed Tree to quickly create a new bush using some different textures I put together using similar techniques as used making the grass, this broke up the green in the scene and added some much needed diversity.


3rd Year Game - Landscape Mk.1

For the third year project my group and myself will be creating a co-op fantasy role-playing game. Though seemingly ambitious, it will be fairly small in comparison to similar games in the genre. As a group of six, we would be pressed for time to create a large scale open world, full of everything you would expect of a modern day RPG.

With that said, my role in the group is environment artist. I am one of two who will be constructing the world space. My more specific role is to create the open world landscape the players will be adventuring in. So my first step is to make the landmass.
This is something I've never tried before, previously I would just model the landscape in either Maya or Unity's own terrain editor. This is fine for small areas, but we needed much bigger world spaces. I decided to learn to use World Machine, as it would give me the creative freedom to sculpt a believable landscape as well as speeding up the whole workflow I was previously using.

To start with I needed a heightmap to get started in World Machine, something that would give a good base to build upon. Using Mudbox, I quickly sculpted the basics of the landscape I'd envisioned. Making sure to keep the brush parameters within the y-axis, I used a combination of the scrape brush and a rocky mask to create the cliffs and hillsides.


With the heightmap exported straight from Mudbox I swiftly moved into World Machine to start refining the natural look of the land. The lower areas around the cliffs was to become the ocean, as such I wanted to create a lot of erosion along the coastline. I added more subtle erosion and terracing around the cliffs and hillsides to show the natural shifting of sediment. To finish the scenery, I used an advanced perlin to randomise the terrain somewhat, making it appear less uniform.

Happy with the overall landscaping, I used a coastal overlay macro to add colour and depth to the terrain, this macro is also what I'll be using to export the various maps I'll need to create the terrain's colour map.


There were lot of maps I needed, these included masks for various textures, flow maps, light map, ambient occlusion, etc. I needed the final heightmap also, the net step is to go back into Mudbox to refine and add more detail to the rock faces.


All the extra maps I exported in World Machine were compiled into the same Photoshop image to create the colour map for the terrain. Using the masks and flow maps, I edited the hue and saturation of each element. The initial map was very lacklustre, it had little definition of the rock faces, the ambient occlusion and light map were too bland, the map just wasn't good enough.


I imported the heightmap, exported earlier from World Machine, back into Mudbox for the final touches. After refining the cliffs and rock faces, I used Mudbox map exporter to create better a ambient occlusion map, as well as a cavity map, normal map and highlights map, Mudbox is a great tool for these maps, I've found the definition on its exports much better than other software. This was the result after applying and playing with the new maps.


Here the colour map is applied to the mesh in Mudbox, I continued to sculpt some more detail into the landscape before exporting the final height map and normal map.


With both the height, normal and colour maps completed, I needed to create the splat map. The splat map uses ARGB to dictate where the various textures maps will go and how they blend.  Using the previously exported masks and Photoshop, I placed each mask in a different RGB channel. Having only three textures, I left the alpha channel blank.

Unity seems to have trouble with heightmaps, it took many attempts before the terrain imported correctly. It recognises the .raw file type, and after using Photoshop to export the height map as the correct file extension, the data was seemingly to be corrupt. Unity didn't seem to recognise the .raw16 extension that I was using to get a 16bit height map as opposed to an 8bit one. It neither recognised .pgm or .tif either, both of which were recommended online. In the end I had to settle with importing an 8bit height map.

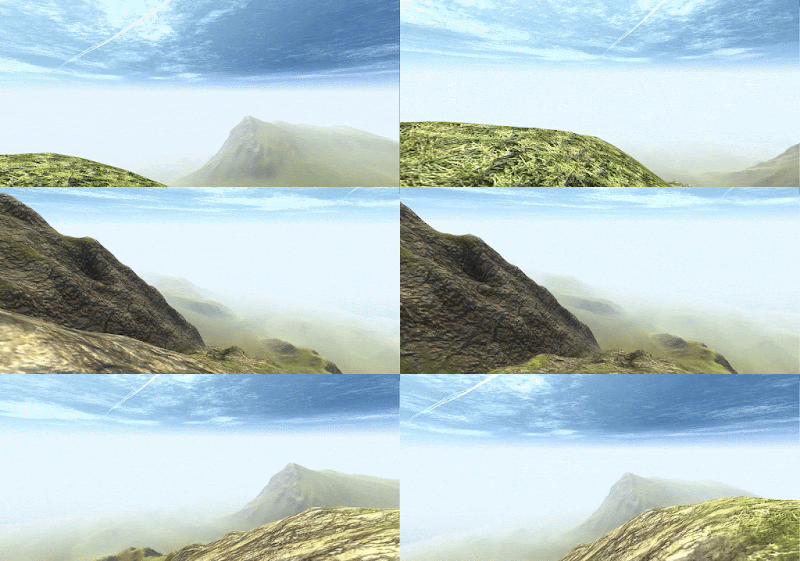
Using a Unity plugin called "ATS Color Map Ultra", I placed each of the various maps in the correct slots, then edited the values until I was satisfied with the results. At this stage I'm using placeholder textures I found on CGTextures.com, I'll later create my own.


Using Unity's own water shader, I added a placeholder ocean. Lastly I messed with the lighting, fog and shadows to finalise the look. These parameters are likely to change though, as I populate the landscape with foliage and structures.