Saturday, 18 June 2016

Speed Tree and Foliage

Speed Tree is another program I'm new to, recommended to me by a friend, it aims to speed up the process of making anything foliage related; from ferns to trees. During my first session using it I create a few things to start filling up my landscape.

Firstly, using some of the provided textures I created a basic tree and bush, added colliders, wind animations, etc. Once I had a grasp of the interface, the software was very easy to understand and gave a great depth of creative freedom.


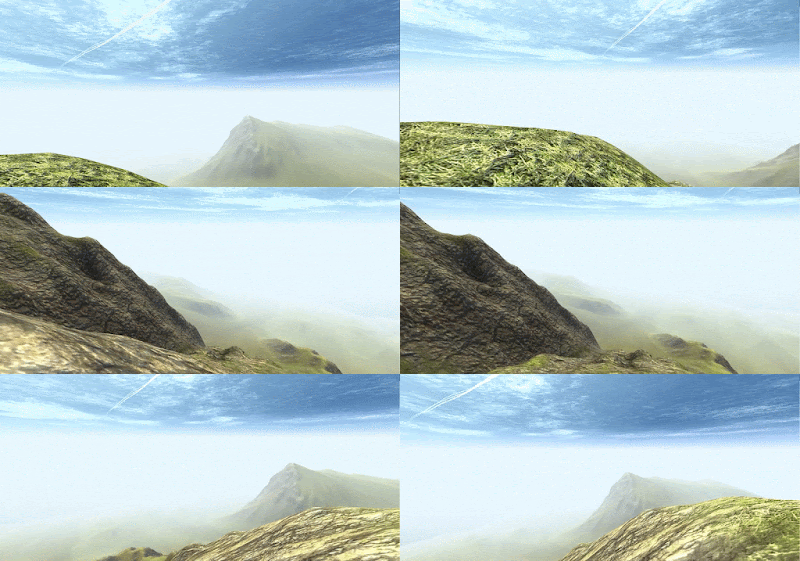
The grass shown in the images above was created previously. Using Maya, I made and arranged some blades of grass and applied a basic colour ramp texture. I projected the grass onto a flat plane and exported it to use in Photoshop. After editing the colour and creating the alpha channel, I dilated the image a few times before importing it into Unity for use.


I went back into Speed Tree to quickly create a new bush using some different textures I put together using similar techniques as used making the grass, this broke up the green in the scene and added some much needed diversity.


3rd Year Game - Landscape Mk.1

For the third year project my group and myself will be creating a co-op fantasy role-playing game. Though seemingly ambitious, it will be fairly small in comparison to similar games in the genre. As a group of six, we would be pressed for time to create a large scale open world, full of everything you would expect of a modern day RPG.

With that said, my role in the group is environment artist. I am one of two who will be constructing the world space. My more specific role is to create the open world landscape the players will be adventuring in. So my first step is to make the landmass.

This is something I've never tried before, previously I would just model the landscape in either Maya or Unity's own terrain editor. This is fine for small areas, but we needed much bigger world spaces. I decided to learn to use World Machine, as it would give me the creative freedom to sculpt a believable landscape as well as speeding up the whole workflow I was previously using.

To start with I needed a heightmap to get started in World Machine, something that would give a good base to build upon. Using Mudbox, I quickly sculpted the basics of the landscape I'd envisioned. Making sure to keep the brush parameters within the y-axis, I used a combination of the scrape brush and a rocky mask to create the cliffs and hillsides.


With the heightmap exported straight from Mudbox I swiftly moved into World Machine to start refining the natural look of the land. The lower areas around the cliffs was to become the ocean, as such I wanted to create a lot of erosion along the coastline. I added more subtle erosion and terracing around the cliffs and hillsides to show the natural shifting of sediment. To finish the scenery, I used an advanced perlin to randomise the terrain somewhat, making it appear less uniform.

Happy with the overall landscaping, I used a coastal overlay macro to add colour and depth to the terrain, this macro is also what I'll be using to export the various maps I'll need to create the terrain's colour map.


There were lot of maps I needed, these included masks for various textures, flow maps, light map, ambient occlusion, etc. I needed the final heightmap also, the net step is to go back into Mudbox to refine and add more detail to the rock faces.


All the extra maps I exported in World Machine were compiled into the same Photoshop image to create the colour map for the terrain. Using the masks and flow maps, I edited the hue and saturation of each element. The initial map was very lacklustre, it had little definition of the rock faces, the ambient occlusion and light map were too bland, the map just wasn't good enough.


I imported the heightmap, exported earlier from World Machine, back into Mudbox for the final touches. After refining the cliffs and rock faces, I used Mudbox map exporter to create better a ambient occlusion map, as well as a cavity map, normal map and highlights map, Mudbox is a great tool for these maps, I've found the definition on its exports much better than other software. This was the result after applying and playing with the new maps.


Here the colour map is applied to the mesh in Mudbox, I continued to sculpt some more detail into the landscape before exporting the final height map and normal map.


With both the height, normal and colour maps completed, I needed to create the splat map. The splat map uses ARGB to dictate where the various textures maps will go and how they blend.  Using the previously exported masks and Photoshop, I placed each mask in a different RGB channel. Having only three textures, I left the alpha channel blank.

Unity seems to have trouble with heightmaps, it took many attempts before the terrain imported correctly. It recognises the .raw file type, and after using Photoshop to export the height map as the correct file extension, the data was seemingly to be corrupt. Unity didn't seem to recognise the .raw16 extension that I was using to get a 16bit height map as opposed to an 8bit one. It neither recognised .pgm or .tif either, both of which were recommended online. In the end I had to settle with importing an 8bit height map.

Using a Unity plugin called "ATS Color Map Ultra", I placed each of the various maps in the correct slots, then edited the values until I was satisfied with the results. At this stage I'm using placeholder textures I found on CGTextures.com, I'll later create my own.


Using Unity's own water shader, I added a placeholder ocean. Lastly I messed with the lighting, fog and shadows to finalise the look. These parameters are likely to change though, as I populate the landscape with foliage and structures.


Wednesday, 27 April 2016

Completed Scene

With the final touches complete the scene was finished. I added sound affects for the tank, wind and rustling trees. The smoke billowing out of the vents was created using Unity's particle system, and I also added some lighting for the headlight and rear ligthts.

When the scene is loaded it plays a cut-scene of the camera orbiting the tank then stopping as it gets to the camp, after which, allowing the player to move around the scene.


I would have liked to add more to the scene, a ravaged city-scape  in the background and other vehicle wrecks would have given more of a background to the tank and overall project. Also I would have make the tank look more post-apocalyptic by adding a lot more metal panelling, but I should have decided that earlier in the project so I could model it in that way.

Finishing Touches

This is the final camp in the scene, the campfire, like the rock, was originally made for another project, as it fit with the subject it is now present in this scene also.
As previously stated with the rock, I used it to create formations by placing them against each other and around the ground. By placing them this way it doesn't look like the same rock and avoids a repeating formation.
Each sign is simply a sprite with a different material. It made it much easier for placement and avoid me having to create separate models for each sign.
After attempting to use Maya's nCloth to animate the tent, I simply used Unity's in-engine cloth. After setting some anchor points it reacts to the windzone in scene effectively.

Foliage, Rocks and Signs


This is a rock I modeled way back for my group game project. To help is fit with this new scene, I lightened the rock somewhat and tinted it brown so it stood out among the snow better. On each end of the rock I coated snow, this is because the rock will be used multiple times in both directions.
The current ground in the scene was fairly sparse, it needed some foliage. I quickly created some blades of grass, then arranged them to look like clumps of grass. Then I baked them through Maya using a diffuse transfer map. I then used the smaller clumps to form a bush as seen above and some larger areas of grass as seen below. 
The grass in the scene used Unity's terrain to react to the wind and animate, whereas the bushes used a shader I created to appear as though there is wind.
These footprints are simple sprites that I placed leading from the tank to the camp. Below are the signs I textured for placement on the tank. I made it a sprite sheet in Unity, and simply changed the material so it was affected by the light in the scene.

Extra Objects

The sides of my tank were looking some-what bare. I decided to make some crates that would carry jerrycans for fuel. I need these objects as low-poly as possible so not to affect the overall performance of the scene. On this crate, I made sure to cut the UVs in such a way that I can create wooden beams that flow the correct way. I added some snow as a final touch to fit with the scene.

Like the crate, the jerrycan needed to be as low-poly, I was also short on time and couldn't model in ZBrush, so after the low poly was finished I moved it into Quixel to create some quick normals. The design on the side is what I came up with, I added snow across the top and some oil prints along the sides where it has been handled.

Top break up the shape of the repeating wheel arches I decided to have a set of log running down one side. Old Russian tanks used to have these log to assist in getting out of mud, snow or any hazardous ground when stuck. Like the jerrycan, after the low-poly was finished I moved it straight to Quixel. Using an image of pine bark I create a sufficient normal map, and used Quixels leather texture for the straps.

The final object I wanted in the scene was a camping tent, something old and beaten-up looking. With an animation, it will help portray the heavy winds and blizzard. Using a simple fabric, mud and snow texture it was good enough to be used.

Trees

For the scene my tank is going to be snow themed. As such I needed a tree to place around the environment. The above image is the first model I made, it wasn't good enough to be in the scene with the rest of the objects, it looked out of place. To create a better looking tree, I used SpeedTree for Unity. After making some snowy pines and bark I combined them with a regular pine texture to create whats seen below. SpeedTree also helped making a wind animation as well as slight variations. I create four levels of detail as well to help the frame-rate of the scene.